
Leather seats and interiors have long been the hallmark of luxury for vehicles. But with the majority of cars now having the option of leather seats, one of the things we very often get asked about is, how to clean leather car seats and the best products to use to clean and protect them.
Below we help you to answer both these questions for your car leather.
It’s not just about maintaining their classy appearance and the superior comfort they provide us whilst traveling. Leather has a distinctive texture and even smell that can never be surpassed by most synthetic materials.
They do however require a little more looking after to keep them looking clean and feeling pliable throughout the years. Leather is an organic material and it has a tough life when used on our seats.
Without realising it we are quite demanding with daily stresses and occasional accidents. Before we know it we have left an unsightly scuff across the seat. Our cosmetics products also like marking our leather too. Or even more horrifying, when new jeans transfer ink marks onto pale cream seats!
Fortunately, with careful treatment, their problems can be easily rectified. With the proper care we can slow (or even reverse) the aging progress and provide more protection. Yet considering how to clean leather car seats often fills heads with conflict and confusion, plus there are so many products available.
With our sensitive leather seats on the line we don’t want to risk causing more harm than good. We want answers to a few simple questions without burying ourselves in opinion and misinformation.
What’s the best way to clean car leather seats?
How can I select best car leather cleaner?
How do I protect leather car seats from drying out and cracking with age?
What’s the best car leather conditioner to use? Do I even need it?
Fortunately, you are now in safe hands, you have stumbled upon the definitive guide on how to clean leather car seats. Within this article you will find the guidance you seek using the top tips and tricks from various automotive detailing professionals.
You will learn how to quickly identify different leathers, choose the best leather cleaning products and complete the process safely and effectively. We even tackle common issues with cleaning perforated leather car seats and light cream coloured seats. Now let’s explore how we can keep your leather seats looking their best!
Essential Knowledge: Know Your Leather
Before we can dig deep into how to clean car leather seats, first you must learn to identify different leather types. Vehicle manufacturers certainly haven’t kept it simple, using different forms and colours on their cars. Fortunately, there are only three categories you need to familiarize yourself with:
Aniline – The most natural form of leather and a rare sight in our cars. It retains a totally natural appearance thanks to minimal processing. Colour may be added using soluble dyes. In essence, it’s raw with no added protection and it’s fragile.
Semi-Aniline is more commonly found in automotive use. It differs by using a thin protective topcoat that seals the leather. It also adds a little extra protection from wear and aging.
Pigmented Leather – A form of leather that has been extensively treated. Through this processing, it becomes highly durable. A strong colour pigment and thick top coating add great protection and seal the leather. With its superior wear resistance and colour possibilities it’s become the most common choice for modern vehicle manufacturers.
Check out this brief video for a direct comparison between these most common leather grades.
Nubuck and Suede may also be used within a small number of vehicles. Nubuck is made from the outer layer of a hide, whereas suede is made from the softer under layer. Both are either brushed or sanded to give their distinctive napped appearance. Not to be confused with Alcantara, the synthetic fabric designed to look and feel like suede and nubuck leather.
The Easy Way To Identify Your Leather
Consulting your vehicle owner’s manual will provide the exact type of leather used for your seats. If this is not available you can always rely on a simple tactile test instead. Consider how the leather feels to the touch, examine the suppleness of the surface.
- If it’s very supple, soft and warm – It’s likely Aniline
- If it’s less supple, more slick and feels like vinyl – It’s most likely Pigmented Leather
- If the surface feels soft and velvety to touch – It’s Nuback or Suede (or Alcantara as above)
The majority of readers will have pigmented leather, and almost all the rest will have Semi-Aniline. These two are referred to as Protected/Sealed Leathers and the primary choice for leather seats in our vehicles. This reason the cleaning guide geared towards the cleaning and care of protected leather.
For the 1% with pure Aniline, we have also included additional information for you. Since your leather is far more fragile you must work with extra care and select specialist products.
Those who believe they have suede or nuback seats consult your owner’s manual. In most cases it may turn about to be the synthetic fabric Alcantara.
Words of Caution: Some vehicles may use different types leather around a single seat. If your in doubt consult your manual for absolute confirmation.
How To Clean Leather Car Seats Effectively
 Most of us will have a form of protected leather on our seats, pigmented or semi-aniline, yet it still requires careful care and attention. This added protective layer helps seal the leather and grant more durability, but it’s not impenetrable by any means.
They still require regular cleaning to keep them looking fresh. When neglected soiling will build and take hold, before long it will show signs of premature aging.
Regular cleaning and mild conditioning periodically is the key to caring for leather seats. Always remember that leather is a delicate material and requires care during cleaning to prevent damage. The absolute best way to clean leather car seats is through a progression of stages, beginning with the least aggressive method.
Stage 1: Simple Leather Seat Cleaning
For this simple cleaning stage you won’t need more than a few household items. Proceed as follows:
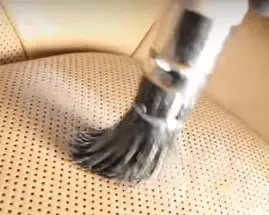
- Use a vacuum or soft bristled brush to remove loose dust, crumbs or other particles from your seats. Ensure you use a soft brush attachment with the vacuum to avoid scratching the surface of your leather.
- Dilute a mild soap/detergent with approximately 8 parts of lukewarm water.
- You may use a sponge lightly but be wary not to overly saturate the leather. Using a spray bottle is a safer form of application, especially for cleaning perforated leather car seats.
- Use a lint-free or microfiber cloth to gently wipe the suds around your leather seats.
- Now spray the seat with clean lukewarm water, wipe over with a clean cloth and remove all soap residues.
- Wipe with a clean dry cloth and allow the interior to air
Important Considerations:
- Don’t over saturate the leather. Take extra care when cleaning perforated leather car seats
- You must only use a MILD soap/detergent, PH-balanced and non-abrasive
- The following products NOT suitable: strong dish detergents, saddle soap, furniture polish, oil, ammonia, alcohol or cleaning solvents
After completing the simple cleaning procedure it’s time to reassess. Was this enough to get your leather seats looking fresh again? If not, continue to read below then proceed to the more intensive cleanse in stage 2. For the newest and well looked after leather seats this may hit the mark already, in this case you can skip to leather conditioning in stage 4.
Troublesome Scuffs and Scratches
Those pesky scuff marks are usually only on the surface. So long as it hasn’t scratched right through the top coat, it can be carefully buffed out through further cleansing and restoration. Don’t worry yet just proceed to the next stage whilst paying special attention to the afflicted area.
For deeper leather penetrating scratches you will require assistance from a leather repair specialist or leather scratch repair kit. In these cases the repair may require advanced treatment and a new clear coat application.
What About Cleaning Cream Leather Car Seats?
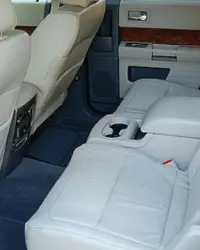 The lightest leather seats will show soiling far more easily. Cosmetics, fake tan and transfer from clothes may seem like a nightmare but usually they can be removed without much fuss.
If this simple clean hasn’t done the trick you will need to look for specialist leather cleaners for light coloured leathers. Many of these will include powerful stain erasers to help shift stains.
Words of Caution: Be careful when using more abrasive products, remember your leather is still delicate. To reduce the chance of damage you must begin by working as gently as possible.
Stage 2: Cleaning Dirty Leather Seats
Those of you cleaning cream leather car seats most likely have found your way here. It’s time to step it up a notch. A more intensive clean calls for some quality leather cleaning products. Select a PH-balanced leather cleaner that indicates suitability for your leather type (protected leather for most).
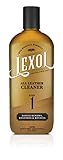
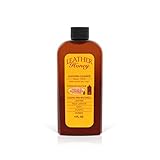
Always choose your car leather cleaner from a reputable brand. If you’re still stuck check out the cleaners from these highly recommended brands below:


Always follow your specific product’s instructions on how to clean leather car seats. However they usually follow a typical application process as detailed below:
- Soak a sponge in a bucket of lukewarm water
- Squeeze out the excess water, leave it moist, apply a little product to sponge
- Work the product around on the sponge, build up a small amount of surface foam
- Apply the foam to each section one at a time, rubbing the sponge to generate a little agitation. You can use small soft brush, such as a nailbrush if required.
- Wipe each section clean using a clean microfiber towel, removing soap along with dislodged soils.
- Complete steps 1-5 for the entirety of the seat. Areas that receive the most skin exposure will require the most attention.
- Finish off by buffing the clean leather surfaces with a clean dry microfiber towel. Allow the seats to air dry fully.
Words of Caution:
- Apply your cleaning product sparingly, even more so for perforated leather seats
- Only use mild pressure, excessive scrubbing will cause damage to the surface
If your leather is now looking great you can head straight to conditioning in Stage 4. If your have been left unloved it’s likely they will need restoration, proceed to the next stage.
Extra Care With Perforated Leathers Seats
Perforated leather use tiny pores on the leather surface to provide additional ventilation. Whilst they perform very well they require extra consideration for cleaning. If we choose the wrong product we will end up with horribly clogged pores! Gel and cream cleaners can accumulate quickly and block these holes. Instead use a liquid cleanerand use it lightly.
I Have Pure Aniline Leather Seats!
For you few, it’s very important to only use products indicated for your unfinished/unprotected leather, such as the liquid leather cleaner mentioned above. Avoid any products labelled for protected leather unless it specially states compatibility. Your leather is far more delicate, using the wrong products can cause more harm than good.
Step 3: Leather Seat Restoration
Leather seats that have been neglected over the years will still show signs of soiling. This calls for us to use advanced cleaners with corrective and restorative properties. These products can have remarkable effects when cleaning leather car seats in older vehicles.
The best car leather cleaners work as systems, using multiple components to restore the leather fully. For the best results it’s essential you follow the manufacturer’s pre-defined process. We do however recommend you look at product systems with a separate leather cleaner and conditioner/restorer.
Here are a few of the highest regarded brands for restorative car leather cleaners:


If you have reached this stage we have exhausted all other options, you need help from more advanced cleaning systems. Whilst they are certainly more costly, it is more than justified by the results they will offer.
Remember: Gel/cream cleaners and perforated seats don’t mix well!
Next you will need to look at conditioning your leather for the full restorative effect.
Stage 4: Leather Seat Conditioning
 Whilst regularly cleaning leather car seats is essential, so is periodic conditioning. Primarily it rejuvenates leather, restores moisture and returns the supple softness. It also protects the leather from pre-mature aging and cracking. It even creates a sliding surface that can repel dirt ingress and reflects the sun’s harmful UV rays.
Even sealed/protected leather still needs mild conditioning to fully protect leather car seats. Whilst looking for the best car leather conditioner, you must be weary not to choose the wrong one. Otherwise it will simply sit on the top coat and make the leather surface greasy.
Avoid products containing the following: Neatsfoot oil, lanolin, mink oil, collagen, aloe
Stick to automotive specific leather conditioners and always check they indicate use for your leather type (sealed/protected or otherwise). Here are some highly recommended brands who have leather conditioning products:

Since the conditioning process is highly product specific you must follow your product instructions to the word. Again it’s certainly worth spending a little extra money when it comes to conditioning. Price is usually an indicator of quality.
Conditioning Perforated Leather Seats
This is the stage where perforated seats require the most caution. Firstly make sure you select a conditioner that will not dry white. Secondly always sparingly apply the product to an applicator and not directly to the leather seat.
Stage 5: On-Going Leather Seat Care
Congratulations, your now you are fully informed on how to clean leather car seats and get them back into prime condition. Once you have gone through this whole process it will be easy to keep them there. If you have had to work through every stage it you work will have certainly paid off.
Quick regular cleaning is the key to keeping your leather seats in great condition.
Monthly (minimum): Complete the simple clean from Stage 1
Monthly (minimum): If you have been slack or had an accident you may need to step up back up to stage 2 with your leather-cleaning product.
3-6 Months: Nourish your leather with a leather conditioner as per stage 4.
Enjoy the process of restoring your leather seats to their former glory, then keep them there without much fuss.
Over To You
If you have enjoyed reading this guide on how to clean leather car seats please feel free to share it with others and also let us know in the comments section below.
Photo Credit: daveiam